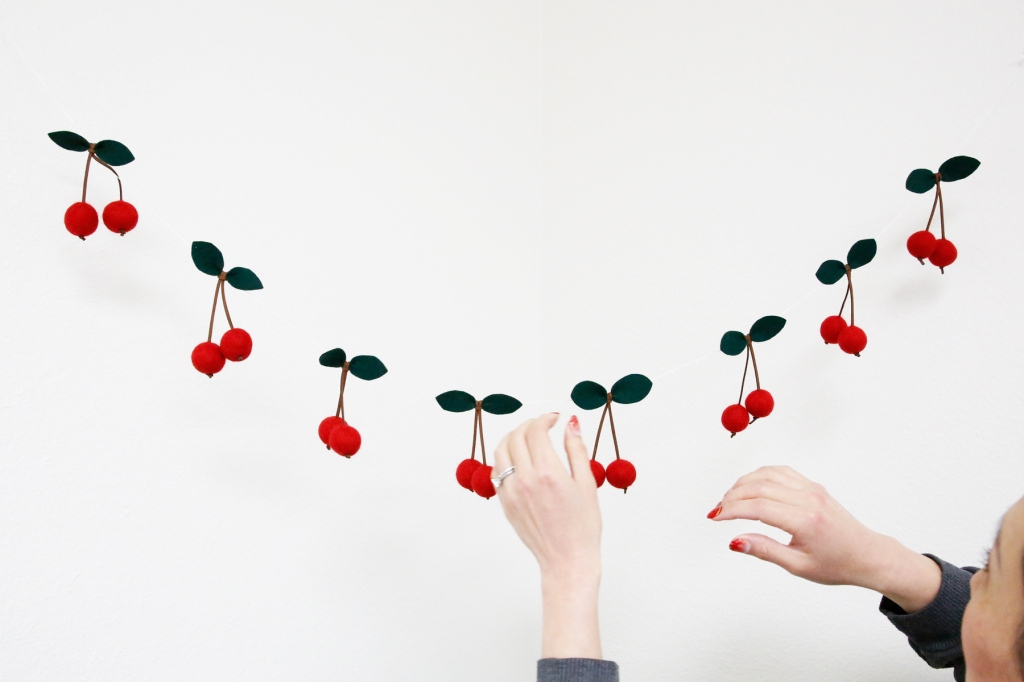
What is cuter than a handmade felt cherry garland? This felt DIY project is perfect for beginners to finish one felt garland in 10 minutes. You’re in the right place if you want something cute to hang or add color to your home this season. You can start this wall hangings project here!
First things first: Make sure you have these materials at home or click to purchase!
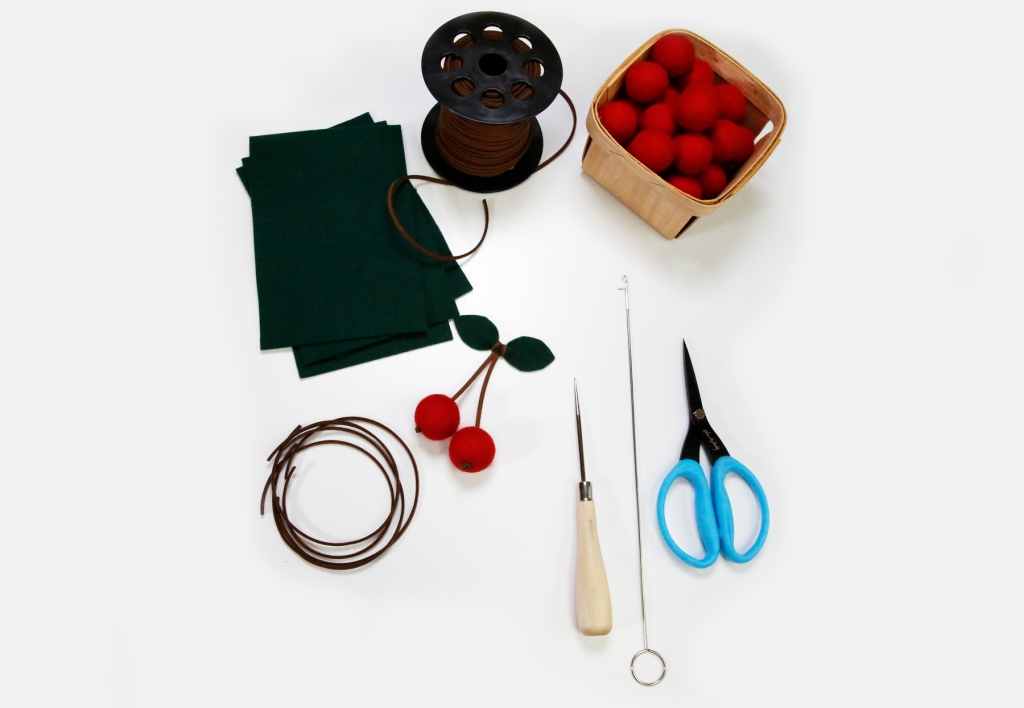
Materials Needed:
- Use red felt balls in the tutorial. You can also use yellow or orange felt balls and as many as you like.
- Felt sheet (green) for leaves (we used 1mm wool felt sheet)
- Awl – the tool for drilling or punching the holes
- Scissor
- Suede cord or thick brown yarn for the steam. Approximately 11 inches for each cherry.
- Loop turner
- Erasable pen for fabric (optional)
Step 1: Cut Leaf Shapes


Use the erasable pen to draw a leaf shape on the green felt. The goal is to create two leaves with one connected piece of felt.

A good shortcut for cutting out the leaves is to fold the fabric but don’t cut the center fold of leaf.
Step 2: Tie the Leaf
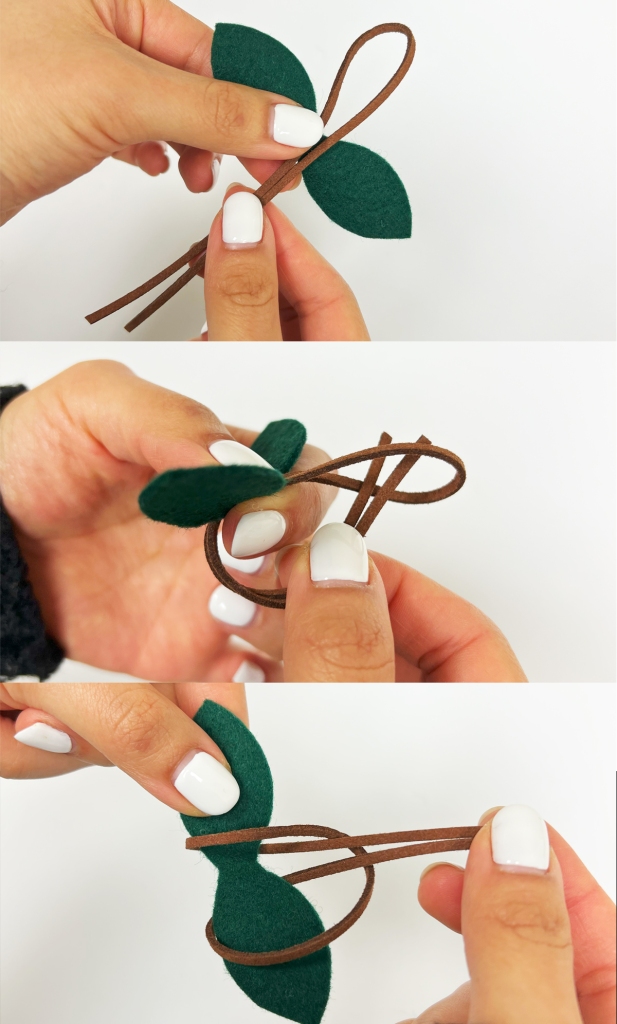
Tie suede cord to leaf as shown in step-by-step photo above.
Step 3: Create Hole in Felt Ball

Use an awl to create a sizeable hole in center of each red ball. You want to make sure you push the awl all the way through to the base of the awl so the hole you create is nice and large to fit the suede cord or thick yarn.
Step 4: Thread the Felt Balls

Pull the suede cord through the hole in the red felt ball. Use a loop turner and go through the center of the ball. Attach the suede cord to end of the loop turner and pull the loop turner back out in the direction that you inserted the turner. It’s important that the metal flap at the tip of the loop turner hook is gently closed over the hook. This prevents the hook from snagging the fibers as you pull it through the ball. The metal flap covering the J hook will give it a smooth surface to glide through the ball. Otherwise, your loop turner will get stuck.

Knot the cord at the bottom of the ball and trim off excess string below knot.

Step 5: Repeat the Process

Repeat Steps 3 to 5 for the other cherry. Make as many cherry pairs as you would like for your decoration.
Step 6: Hang and Enjoy!

Your felt cherry garland is ready! Put it up wherever you want, whenever you want. Enjoy the sweet and whimsical touch it brings!
Customize colors and sizes to your liking and enjoy making a cute Felt cherry decorations! Have fun with it! 🍒🌿
Comment below if you have any questions. Feel free to share your opinions or what felt idea or felt tutorial you want to learn this season!
How to felt wool? What is wool felt? Where to buy wool felt? We have the country’s largest selection of felt wool, roving, felt balls, and shapes!
https://www.thefeltpod.com/ We are offering our first workshop that teaches you what wool felt is and how to fit wool into the cutest bunny and egg for Easter! Book the class on 03/23 Saturday for you and your friends! https://squareup.com/appointments/book/classes/c10anx3yglzc4p/LHWXJ6ZQFAC8K/classes
Shop our 100% wool felt balls and sheets and make your store display or home decor today at thefeltpod.com!

Leave a comment